Register for a developer ID which only cost USD25 for life. Another consideration: you need to pay through Google Wallet, using a credit card.
https://play.google.com/apps/publish/
Though you have uploaded the signed APK, yet you still could not publish you app, why? These are the requirements you need to set;
- You need to add a high-res icon. (size 512px x 512px)
- You need to add a feature graphic. (size 1024px x 500px)
- You need to add at least 2 non-Android TV screenshots. (2 screenshot images. Min length for any side: 320px)
- You need to select a category.
- You need to select a content rating.
- You need to add a short description.
- You need to add a full description.
- You need to acknowledge that this application meets the Content Guidelines.
- You need to acknowledge that this application complies with US export laws.
- You need to target at least one country.
- You need to enter a privacy policy URL.
- You need to make your application free or set a price for it.
Follow the rest of the tutorials below...
STEP 1 Loading APK
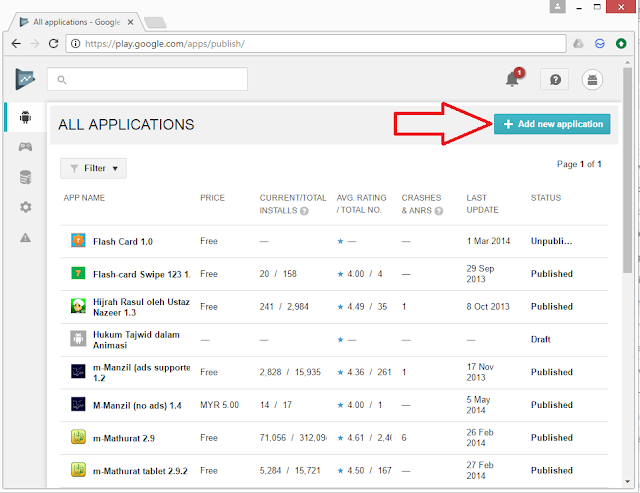
Add new application
Provide the app's title and hit Upload APK button
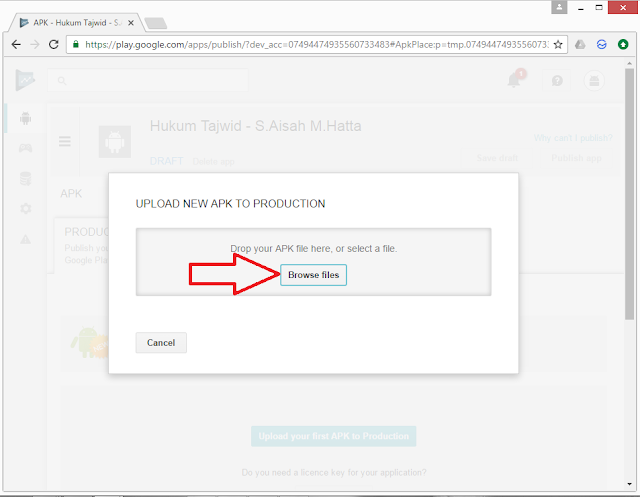
Browse and upload APK for production
Locate your APK
Wait for a while for the APK to be uploaded.
STEP 2 APP's Store Listing
Next, go to the menu on your left and select Store Listing.
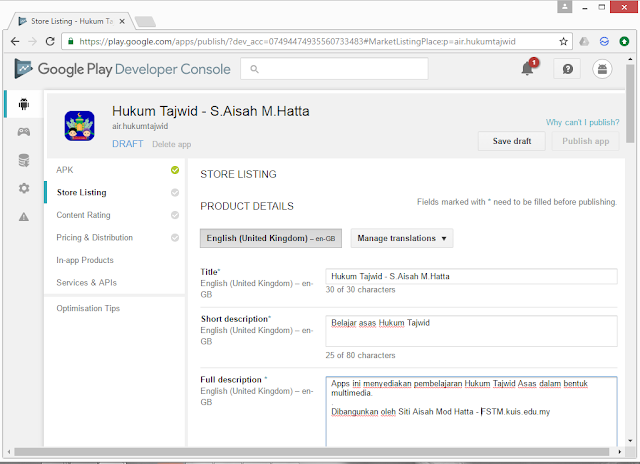
Provide the Title of the app, short description and Full description.

Scroll down a bit. Upload the 2 mandatory screenshots. (2 screenshot images. Min length for any side: 320px)
Scroll down a bit. This time upload a PNG image file of a high resolution icon (size 512px x 512px). And the feature graphic for the apps’ page banner (size 1024px x 500px).
Scroll down a bit. Provide the Application Type, Category, and the content rating. Provide also your apps’ website, email and phone.
Scroll down a bit. Uncheck if you are not submitting the privacy policy.
Scroll to the top and hit “Save draft”
STEP 3: CONTENT & RATING
The next to work for is the content & rating. Hit the menu on your right.

Choose your app's category.

Answer NO to most of the questions. YES only when applicable.
Calculate rating (don't worry the system will do this)
STEP 4: PRICE & DISTRIBUTIONS
The last panel to complete is the Pricing & Distribution information.
Set the pricing FREE, if you’d like to distribute freely. And the free apps will remain free forever.
Select SELECT ALL COUNTRIES if you’d like to make it available to rest of the world.
Scroll to the bottom. Declare if your app diplay advertisements.
Don't check the Google Play for Education unless you are sure the content is suitable for education purpose. This will involve longer time for approval as it will go through manual verification.
Check the Content Guidelines and US Export law.
Scroll to the top and hit “Save draft”.
STEP 5: APP IS READY TO BE PUBLISHED
If no errors, then you’re ready to publish the apps. Hit the “Publish App” button. Your app is ready for publication. To date there is a manual review of your app to make sure you do not publish malware of naughty apps.
Again, wait for few hours before your app will appear in Google PlayStore.
Alhamdulillah!!! The app is already published... Congratulations...
Need face-to-face lesson?, we also provide Android Studio training
-->> bit.ly/androidjsk
-->> bit.ly/androidjsk
Harap bagitau kawan-kawan dengan tekan butang SHARE di bawah
SHARE to your friends...
SHARE to your friends...


Comments
Post a Comment