This post is written for the 2nd MobileSIG-meetup BBBangi Chapter, Sunday, October 2nd, 2011…
This apps might look simple and dumb, somehow it just an example for beginner. Shall I say “Buttons and Textboxes in Android for Dummies”.
Learning outcome:
At the end of this session you should be able to create an Android app that contains textbox and button widgets, and applying ActionListener to the button…
Pre-requisites:
Before reading this tutorial, you need to read;
EXAMPLE 1: Dealing with only one Button
EXAMPLE 2: Dealing with two Buttons in an App
Hope you find it useful.
Before I proceed to the examples, let me brief you the elements inside an Android Project through Eclipse IDE (Figure 1).
![image_thumb[4]](https://blogger.googleusercontent.com/img/b/R29vZ2xl/AVvXsEjEhvQ0pqUXeQ_xYdBJKZrV7v6t_tYHGfoxUrjg6FMLb4tY8RilH82j35r7aNrH-E6fu0bWNUl_d8eMp7dcn8YJ44PzNOKs9mCfmqI-MOLpSWHZELq74JPJaAiDmOeUgyrqulu2cd2nSvE/?imgmax=800 "image_thumb[4]") Figure 1
Figure 1
Enhance the Package Explorer (Figure 2) and you will see several folders in the Project.
![image_thumb[7]](https://blogger.googleusercontent.com/img/b/R29vZ2xl/AVvXsEjCg9Wx8oEonjlB4gd08rXhebzkAKR2uqtWhWNZ7REuHxyFI9E5Z8tV-z_WTq-UjAttheE4M_Bz8cZ5I9Fo-qhEIHiiy_dKRCjhKrj3SQxfr5yvKT75JtGmc8ANk3VaQRzep_w_QsNx3UY/?imgmax=800 "image_thumb[7]") Figure 2
Figure 2
Inside Android Project, there should be;
/src – the Java codes are here
/gen – generated automatically
/assets – put your fonts, videos, sounds here
/res – images, layout and global variables
EXAMPLE 1: Dealing with only one Button
This sample contains two textboxes with only one button as the trigger.
The GUI Layout;
The source code; copy and paste in the *.java file in the src folder.
The output;

EXAMPLE 2: Dealing with two Buttons in an App
It has two EditText and two Button. It is to accept two numbers, and if user tap on the button “+”, it will sum-up both numbers. The second button, “-”, will off-course subtract second number from the first.
The GUI Layout;

The main.xml;
The source code; copy and paste in the *.java file in the src folder.

This apps might look simple and dumb, somehow it just an example for beginner. Shall I say “Buttons and Textboxes in Android for Dummies”.
Learning outcome:
At the end of this session you should be able to create an Android app that contains textbox and button widgets, and applying ActionListener to the button…
Pre-requisites:
Before reading this tutorial, you need to read;
- If you do not have Eclipse and Android SDK installed, you should read the following http://blog.kerul.net/2011/06/eclipse-helios-android-development.html
- How to Create a new Android Project in Eclipse with ADT11.
- And it might be useful activate the Properties window by reading this article - http://blog.kerul.net/2011/08/properties-window-for-adt-11-on-eclipse.html
EXAMPLE 1: Dealing with only one Button
EXAMPLE 2: Dealing with two Buttons in an App
Hope you find it useful.
Before I proceed to the examples, let me brief you the elements inside an Android Project through Eclipse IDE (Figure 1).
![image_thumb[4]](https://blogger.googleusercontent.com/img/b/R29vZ2xl/AVvXsEiXbk6IHkkgoqcKTM7gD-nq27PIXVhKuQwtvE9DAEX4FafmioEwe9i3gNRGsZH0o8Sv5KWpXGBdd_fPx-yo0XEKj4XPTxrRT4bXP1HX3_-SOv8qxR_AtE4nGyqdkHdCnmHF8wRF0Fkb5vI/s1600-h/image_thumb%25255B4%25255D%25255B2%25255D.png "image_thumb[4]") Figure 1
Figure 1Enhance the Package Explorer (Figure 2) and you will see several folders in the Project.
![image_thumb[7]](https://blogger.googleusercontent.com/img/b/R29vZ2xl/AVvXsEgTKIWiEwi0eFzUQ-k0jfWYEK0ZE19mAG8hn0xAYTKzLj6_XEmJTJZSDXifIEAxXk0gjdkw_ZKDoXLmhigu9Z6l-6xkCpyZ-rsL-0fg-1SyJZbYdXPJmsIUK6gjhUBbR_MQj7X3IrQrNf8/s1600-h/image_thumb%25255B7%25255D%25255B2%25255D.png "image_thumb[7]") Figure 2
Figure 2Inside Android Project, there should be;
/src – the Java codes are here
/gen – generated automatically
/assets – put your fonts, videos, sounds here
/res – images, layout and global variables
/drawable-hdpi – images for high spec phonesAndroidManifest.xml – app’s permissions need to be registered here – (eg: app can access Internet, phone contacts, camera, etc must be mentioned here)
/drawable-ldpi – images for low spec phones
/drawable-mdpi – images for medium spec phones
/layout – all XML file for the screen(s) layout are here
/values – constant variables can also be here, the value is accessible from all classes and screens
EXAMPLE 1: Dealing with only one Button
This sample contains two textboxes with only one button as the trigger.
The GUI Layout;
<?xml version="1.0" encoding="utf-8"?>
<LinearLayout xmlns:android="http://schemas.android.com/apk/res/android"
    android:orientation="vertical"
    android:layout_width="fill_parent"
    android:layout_height="fill_parent"
    >
    <TextView android:layout_width="wrap_content" android:layout_height="wrap_content"
        android:id="@+id/textView1" android:text="Sila masukkan nombor pertama"></TextView>
    <EditText android:layout_width="match_parent" android:layout_height="wrap_content"
         android:inputType="number" android:id="@+id/txtnum1">
        <requestFocus></requestFocus>
    </EditText>
    <TextView android:layout_width="wrap_content" android:layout_height="wrap_content"
        android:id="@+id/textView2" android:includeFontPadding="true"
        android:text="Sila masukkan nombor kedua"></TextView>
    <EditText android:layout_width="match_parent" android:layout_height="wrap_content"
        android:inputType="number" android:id="@+id/txtnum2"></EditText>
    <Button android:layout_width="wrap_content" android:id="@+id/btnadd"
        android:layout_height="wrap_content" android:text="ADD"></Button>
    <EditText android:layout_width="match_parent" android:layout_height="wrap_content"
        android:inputType="number" android:id="@+id/txtresult"></EditText>
</LinearLayout>
The source code; copy and paste in the *.java file in the src folder.
package net.kerul.calc;

import android.app.Activity;
import android.os.Bundle;
import android.view.View;
import android.view.View.OnClickListener;
import android.widget.Button;
import android.widget.EditText;

public class CalculatorActivity extends Activity implements OnClickListener{

    private EditText txtnum1, txtnum2, txtresult;
    private Button btnadd;
    /** Called when the activity is first created. */
    @Override
    public void onCreate(Bundle savedInstanceState) {
        super.onCreate(savedInstanceState);
        setContentView(R.layout.main);

        txtnum1=(EditText) findViewById(R.id.txtnum1);
        txtnum2=(EditText) findViewById(R.id.txtnum2);
        txtresult=(EditText) findViewById(R.id.txtresult);

        btnadd = (Button) findViewById(R.id.btnadd);
        btnadd.setOnClickListener(this);

    }
    public void onClick(View v) {
        //method handling button click
        double n1,n2, result;
        n1=Double.parseDouble(txtnum1.getText().toString());
        n2=Double.parseDouble(txtnum2.getText().toString());
        result=n1+n2;
        txtresult.setText(Double.toString(result));
    }
}
The output;

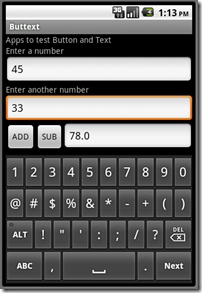
EXAMPLE 2: Dealing with two Buttons in an App
It has two EditText and two Button. It is to accept two numbers, and if user tap on the button “+”, it will sum-up both numbers. The second button, “-”, will off-course subtract second number from the first.
The GUI Layout;

The main.xml;
<?xml version="1.0" encoding="utf-8"?>
<LinearLayout xmlns:android="http://schemas.android.com/apk/res/android"
    android:layout_width="fill_parent"
    android:layout_height="fill_parent" android:orientation="vertical">
<TextView
    android:layout_width="fill_parent"
    android:layout_height="wrap_content" android:text="Apps to test Button and Text"/>
<TextView android:layout_width="wrap_content" android:layout_height="wrap_content"
    android:id="@+id/textView1" android:text="Enter a number"></TextView>
<EditText android:layout_width="match_parent" android:layout_height="wrap_content"
    android:inputType="number" android:id="@+id/txtnum1">
</EditText>
<TextView android:layout_width="wrap_content" android:layout_height="wrap_content"
    android:id="@+id/textView2" android:text="Enter another number"></TextView>
<EditText android:layout_width="match_parent" android:layout_height="wrap_content"
    android:inputType="number" android:id="@+id/txtnum2"></EditText>
<TableRow android:id="@+id/tableRow1" android:layout_height="wrap_content"
    android:layout_width="match_parent">
    <Button android:layout_height="wrap_content" android:layout_width="wrap_content"
        android:text="   +   " android:id="@+id/btnadd"></Button>
    <Button android:layout_height="wrap_content" android:layout_width="wrap_content"
        android:text="   -   " android:id="@+id/btnsubtract"></Button>
    <EditText android:layout_height="wrap_content" android:layout_width="match_parent"
        android:freezesText="true" android:text="Result here"
        android:editable="false" android:id="@+id/txtresult"></EditText>
</TableRow>

</LinearLayout>
The source code; copy and paste in the *.java file in the src folder.
package net.kerul.buttext;

import android.app.Activity;
import android.os.Bundle;
import android.view.View;
import android.view.View.OnClickListener;
import android.widget.Button;
import android.widget.EditText;

public class ButtextActivity extends Activity implements OnClickListener{

    //declare all controls
    private Button btnadd, btnsubtract;
    private EditText txtnum1, txtnum2, txtresult;
    private double n1,n2, res;
    /** Called when the activity is first created. */
    @Override
    public void onCreate(Bundle savedInstanceState) {
        super.onCreate(savedInstanceState);
        setContentView(R.layout.main);

        btnadd = (Button) findViewById(R.id.btnadd);
        btnadd.setOnClickListener(this);

        btnsubtract = (Button) findViewById(R.id.btnsubtract);
        btnsubtract.setOnClickListener(this);

        txtnum1=(EditText) findViewById(R.id.txtnum1);
        txtnum2=(EditText) findViewById(R.id.txtnum2);
        txtresult=(EditText) findViewById(R.id.txtresult);

    }
    public void onClick(View v) {
    //method handling button click
        n1=Double.parseDouble(txtnum1.getText().toString());
        n2=Double.parseDouble(txtnum2.getText().toString());

        if (v.getId()==R.id.btnadd){
            res=n1+n2;
            txtresult.setText(Double.toString(res));
        }

        if(v.getId()==R.id.btnsubtract){
            res=n1-n2;
            txtresult.setText(Double.toString(res));

        }
    }
}

And the full source code is available here –> http://sdrv.ms/MebA5R
Comments
Post a Comment